Showing posts with label detector. Show all posts

Monday, September 2, 2013

0 Comments
Posted in Arrangement, Art, Business

Economy Radar Detector Circuit

Circuit Diagram
Description
This circuit uses a 1458 dual op-amp to form a radar detector. C1 is the detector of the radar signal. The first op-amp forms a current-to-voltage converter and the second op-amp buffers the output to drive the piezo transducer. R5 sets the switching threshold of the second op-amp; normally it is adjusted so that the circuit barely triggers on background noise, then its backed off a bit. The response of the circuit may be tuned by adjusting the length of the leads on C1. For typical road-radar systems, the input capacitors leads should be about 0.5 to 0.6 inches long.


Author: "Radio-Electronics" Magazine, Jul,86 issue (C) Copyright Gernsback Publications, Inc., 1986
 Source http://www.electronics-lab.com/

Thursday, August 15, 2013

0 Comments
Posted in Arrangement, Art, Business

Simple Proximity Detector Alarm Circuit

This is a simple proximity switches with IC 4049th The IC4049 is a bipolar monolithic integrated circuit for use in metal-detection system / proximity sensing applications IC4049 includes an oscillator constituted by an external parallel resonant tank circuit and a feedback resistor connected 2-5 The internal oscillator operates near the resonant frequency of the tank is brought circuit.As a metal object near the coil begins to decrease the amplitude of the voltage across the tank gradually.

Proximity Detector & Alarm Circuit


If the envelope of the oscillation a certain level, the greater the resistance the greater the travel distance.Detection-point range with a high Q coil.Maximum possible range can be achieved with a well extended to 1-inch drive circuit. Only So this circuit, the tuning circuit to a certain range.

For making it easy to a metal coil at the desired distance (1 inch) square and adjust the resistance, C1 and C2 (make Pin2 or 5) one of the outputs in the state change.

Monday, July 29, 2013

0 Comments
Posted in Arrangement, Art, Business

Laser Level Detector

Rotating laser levels, which are very handy  for setting objects in a room or garden at the  same height, are available at prices of a few  dozen pounds. At relatively large distances  and for outdoor use, the light from the rotating laser beam is often not easy to see, and  the laser beam detector described here can  be useful in such situations. The detector  works well at distances up to 50 metres (150  feet) and consists entirely of standard components. The detector is housed in a plastic case  that can be fixed to an object (such as a post  or a beam). It has three LEDs and a beeper that  indicate whether the object should be raised  or lowered.
Laser Circuit 1
LEDs with a transparent package and integrated lens (round surface) are used as sensors. The top and bottom detection zones  each have five LEDs and two opamps (IC1a &  IC1b or IC1c & IC1d), which drive the ‘Move  Up’ and ‘Move Down’ indicator LEDs. The middle sensor LED drives the ‘OK’ indicator LED  via two opamps (IC2a & IC2b).  The rising edges of the opamp output signals  trigger three separate monostable multivibrators (type CD4047). If desired, the circuit  shown inside the dashed outline (one gate of a  CD4044 quad RS latch) can be used in place of  each of the monostable multivibrators. In this  case the output signal has the opposite polar-ity, so the BS170 N-channel MOSFET must be  replaced by a P-channel type.
Laser Circuit 2

The monostable time of the middle retriggerable MMV should be longer than the rotation period of the laser (e.g. with a 2 rpm laser  it should be longer than 500 ms) so that the  beeper will emit a continuous tone. Most  rotating laser levels have variable speed, so  this can also be achieved by adjusting the peed if necessary. The monostable times of  the upper and lower MMVs are dimensioned  to generate clearly distinguishable short and  long beeps, respectively. The three MOSFETs  (T1, T2 and T3) are configured as a wired-OR  gate to drive the shared beeper. The fourth  MOSFET (T4) drives the ‘OK’ LED.
The circuit can be housed in an enclosure  together with three penlight cells.

Source: http://www.ecircuitslab.com/2012/05/laser-level-detector.html


Thursday, July 4, 2013

0 Comments
Posted in Arrangement, Art, Business

Beat Balance Metal Detector

A Beat Balance Metal Detector made from discrete components.

Beat Balance Metal Detector Schematic


Notes:

Various embodiments of the BB metal detector have been published, and it has been widely described in the press as a new genre. Instead of using a search and a reference oscillator as with BFO, or Tx and Rx coils as with IB, it uses two transmitters or search oscillators with IB-style coil overlap. The frequencies of the two oscillators are then mixed in similar fashion to BFO, to produce an audible heterodyne. On the surface of it, this design would seem to represent little more than a twinned BFO metal detector. However, what makes it different above all else, and significantly increases its range, is that each coil modifies the frequency of the adjacent oscillator through mutual coupling. This introduces the "balance" that is present in an IB metal detector, and boosts sensitivity well beyond that of BFO. Since the concept borrows from both BFO and IB, I have given a nod to each of these by naming it a Beat Balance Metal Detector, or BB for short. Happy hunting!

Saturday, April 13, 2013

0 Comments
Posted in Arrangement, Art, Business

Simple metal detector circuit diagram using CS209A

This simple metal detector circuit diagram is used to sense the presence of metal. A 100uH is used as a sensor. IC C209A has a build in oscillator circuit and the coil L1 form a part of its external LC circuit which determines the frequencies oscillation. When there is a presence of metals, the inductance of the coil is change and the resultant change in oscillation is demodulated to create an alarm. The LED also gives as a visual indicator. This circuit can sense metals up to a distance of few inches. Adjust the value of R1 POT to adjust the sensitivity.


Friday, April 12, 2013

0 Comments
Posted in Arrangement, Art, Business

Water Level Controller Detector

In most houses, water is first stored in an underground tank (UGT) and from there it is pumped up to the overhead tank (OHT) located on the roof. People generally switch on the pump when their taps go dry and switch off the pump when the overhead tank starts overflowing. This results in the unnecessary wastage and sometimes non-availability of water in the case of emergency.  The simple circuit presented here makes this system automatic, i.e. it switches on the pump when the water level in the overhead tank goes low and switches it off as soon as the water level reaches a pre-determined level. It also prevents ‘dry run’ of the pump in case the level in the underground tank goes below the suction level. 

  Water Level Contoroller Circuit diagram
In the figure, the common probes connecting the underground tank and the overhead tank to +9V supply are marked ‘C’. The other probe in underground tank, which is slightly above the ‘dry run’ level, is marked ‘S’. The low-level and high-level probes in the overhead tank are marked ‘L’ and ‘H’, respectively.  When there is enough water in the underground tank, probes C and S are connected through water.As a result,transistor T1 gets forward biased and starts conducting. This, in turn, switches transistor T2 on. 

Initially, when the overhead tank is empty, transistors T3 and T5 are in cut-off state and hence pnp transistors T4 and T6 get forward biased via resistors R5 and R6, respectively.  As all series-connected transistors T2, T4, and T6 are forward biased, they conduct to energise relay RL1 (which is also connected in series with transistors T2, T4, and T6). Thus the supply to the pump motor gets completed via the lower set of relay contacts (assuming that switch S2 is on) and the pump starts filling the overhead tank. 

Water Level Contoroller Tank Circuit

Once the relay has energised, transistor T6 is bypassed via the upper set of contacts of the relay. As soon as the water level touches probe L in the overhead tank, transistor T5 gets forward biased and starts conducting. This, in turn, reverse biases transistor T6, which then cuts off. But since transistor T6 is bypassed through the relay contacts, the pump continues to run. The level of water continues to rise.  When the water level touches probe H, transistor T3 gets forward biased and starts conducting. This causes reverse biasing of transistor T4 and it gets cut off. As a result, the relay de-energises and the pump stops. Transistors T4 and T6 will be turned on again only when the water level drops below the position of L probe. 

Presets VR1, VR2, and VR3 are to be adjusted in such a way that transistors T1, T3, and T5 are turned on when the water level touches probe pairs C-S, C-H, and C-L, respectively. Resistor R4 ensures that transistor T2 is ‘off’ in the absence of any base voltage. Similarly, resistors R5 and R6 ensure that transistors T4 and T6 are ‘on’ in the absence of any base voltage. Switches S1 and S2 can be used to switch on and switch off, respectively, the pump manually.  You can make and install probes on your own as per the requirement and facilities available. However, we are describing here how the probes were made for this prototype. 

The author used a piece of non-metallic conduit pipe (generally used for domestic wiring) slightly longer than the depth of the overhead tank. The common wire C goes up to the end of the pipe through the conduit. The wire for probes L and H goes along with the conduit from the outside and enters the conduit through two small holes bored into it as shown in Fig. 2. Care has to be taken to ensure that probes H and L do not touch wire C directly. Insulation of wires is to be removed from the points shown. The same arrangement can be followed for the underground tank also. To avoid any false triggering due to interference, a shielded wire may be used.


http://www.ecircuitslab.com/2011/09/water-level-controller.html

Saturday, April 6, 2013

0 Comments
Posted in Arrangement, Art, Business

Heat Sensor Fire Detector Pyroelectric

Pyroelectric
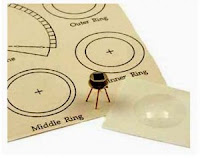
Detect the presence of fire in the world of electronics can be done by detecting changes in temperature, the presence of UV ultraviolet rays and infrared light IR. Heat Sensor pyroelectric detectors Eltec E442-3 is a heat sensor (fire) that detect the presence of infrared ray IR, and therefore often called IR-EYE.

These sensors form of Lithium Tantalate pyroelectric parallel opposed dual element high gain detector with integrated analog signal processing. These sensors can detect heat changes from -40 to +70 degrees Celsius without change siginfikan of noise and sensitivity.

To use heat sensor pyroelectric detectors Eltec E442-3, it can take a kind of cone is covered with a fresnel lens to focus the direction of the infrared ray IR. Heat sensors then pyroelectric detectors Eltec E442-3 inserted into the cone is then connected to the microcontroller. Analog output value signals which when detects heat, the sensor will cause a drastic change in output voltage.

    Total Pageviews